usethis::create_project("my_git/subfolder/project_name")Using the usethis package
First, we use spotlight to open RStudio (unless it’s already open).
In the upper right corner, it should say Project: (None). Now, we will use the usethis package to create a new project, track it with git, and upload it to GitHub.
Note
For the following to work, you must have the folder my_git and subfolder where subfolder should be your first name. See here at the bottom of the page if you have not yet created them.
In the console, write:
This will create and open a new R-project in ~/my_git/subfolder/project_name. The folder structure is up to you, personally, I like to keep all git-repos in sub-folders of my_git, and where subfolder is the name of the repo owner, so in this case it would be ~/my_git/Michael/project_name.
In the console of the newly opened R-Studio (which now should have project_name in the upper right corner), write:
usethis::use_git()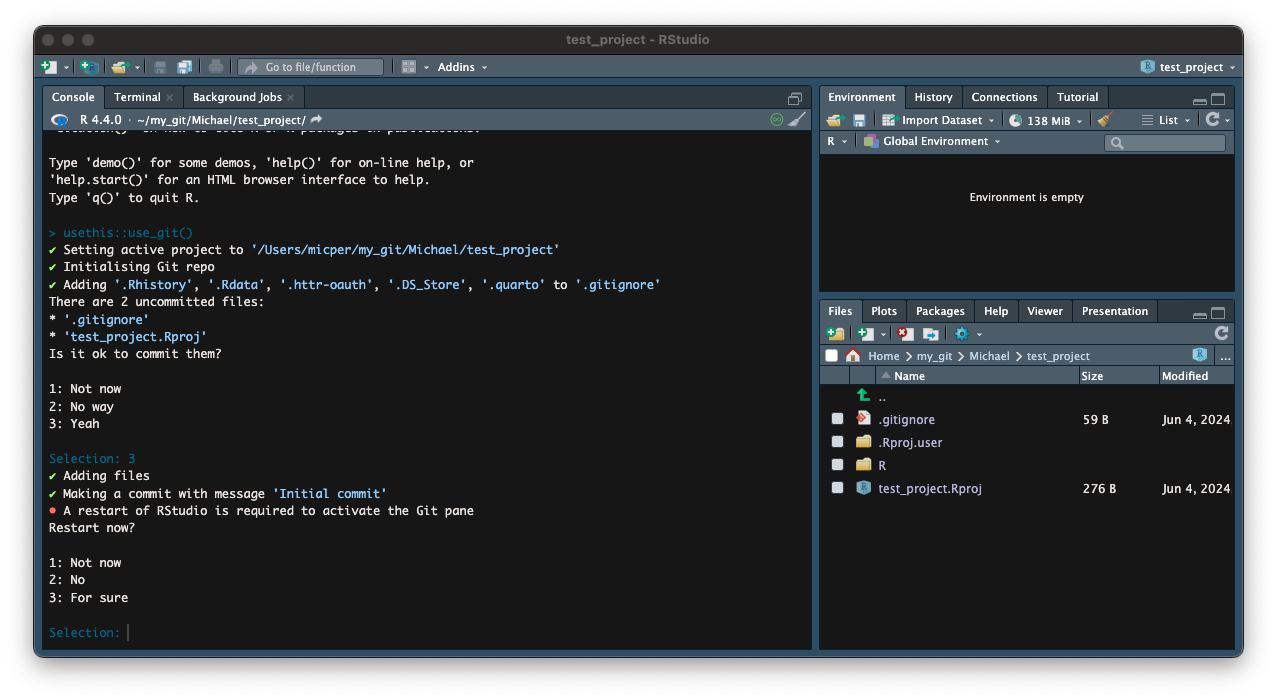
Next, link it to Github (use option private = T if you want to create a private repo):
usethis::use_github(private = T)Now you are ready to create your first file, press Shift+Command+pShift+Command+p and select Create a New R Script. I recommend keeping track of dependencies using renv, so start using renv and then install any packages needed by typing in the Console:
renv::init()
renv::install("dplyr")
Note that renv::init() only needs to be the one time for each new project to setup the infrastructure needed. When finishing for the day, register all new packages with renv::snapshot(), save and close R-Studio, and then in the terminal do git add ., git commit -m "Beginning on my new project, and last git push.
That marks the end of this guide. In the following section, I will demonstrate a suggested workflow when being invited to collaborate on a project.