Installing RStudio
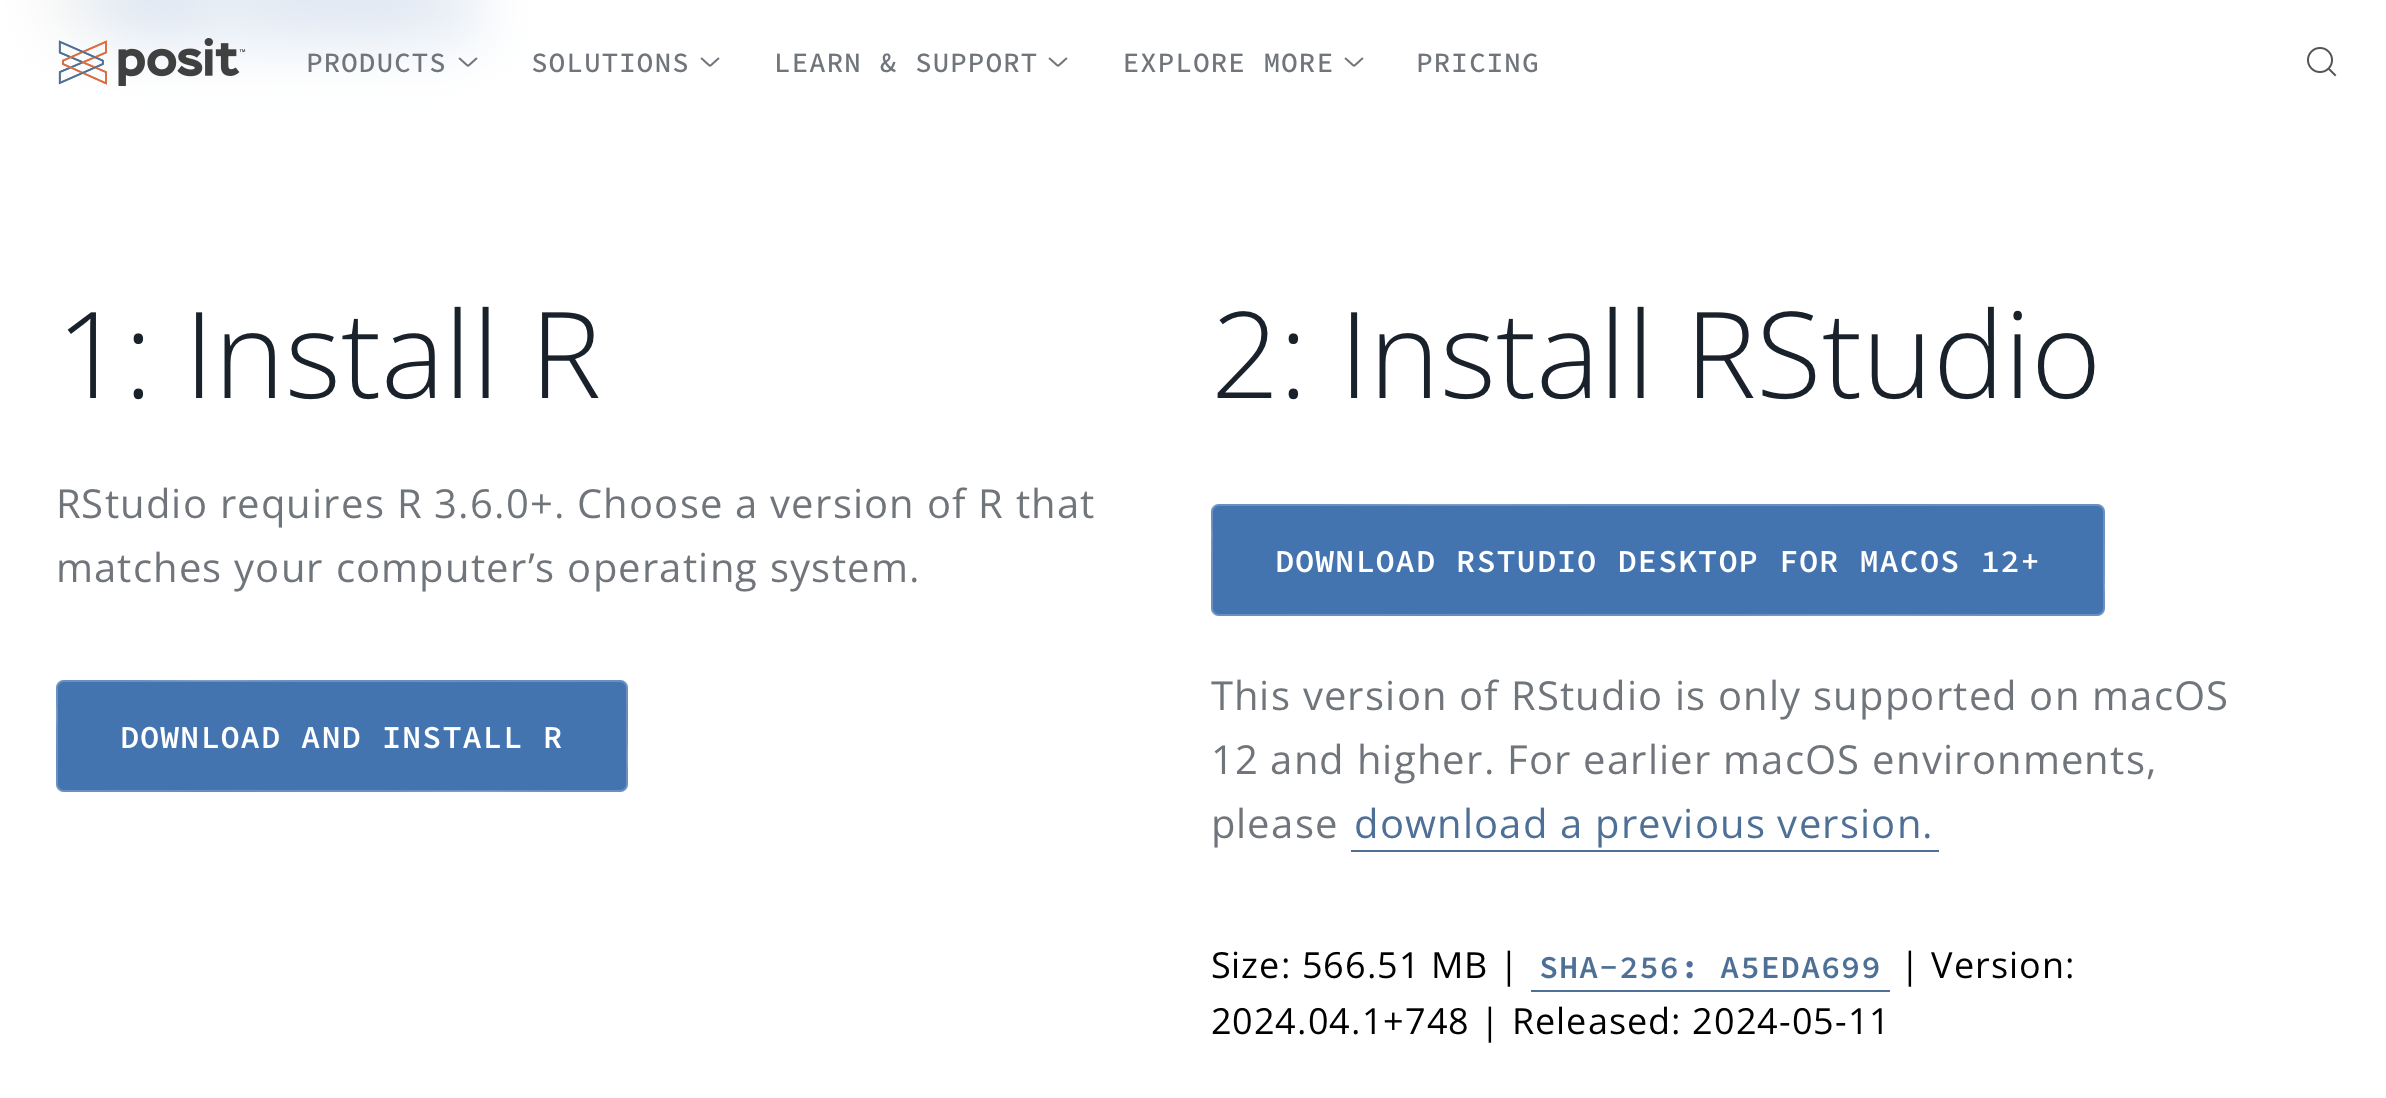
Now, it’s finally time to install RStudio. Go to https://posit.co, and click on “Download Rstudio”. Don’t click the button that says “Download Rstudio Server”, but use the regular desktop version.
Since you have already installed R, go ahead and click on “Download Rstudio Desktop for macOS 12+”
Drag the RStudio icon into your Applications folder. Once the installation finishes, eject the .dmg file and move it to the trash.
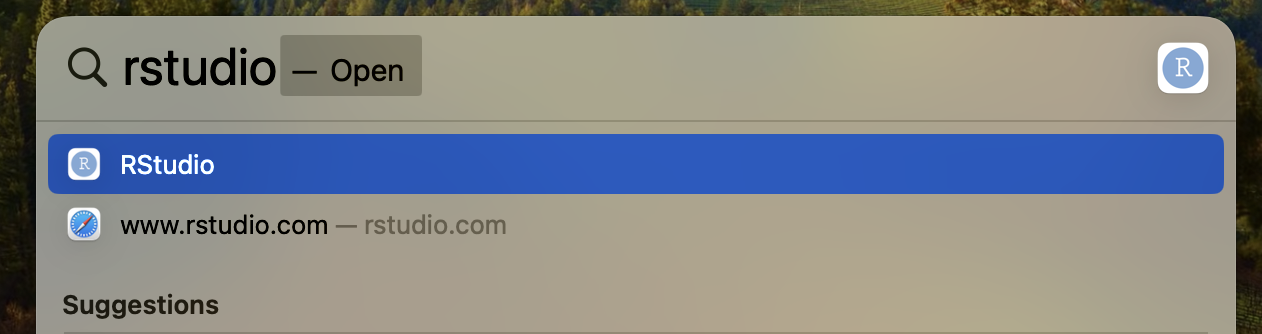
Then open RStudio either by double clicking on the RStudio icon in the Applications folder, or using spotlight by pressing Command+SpaceCommand+Space and typing rstudio.
If you don’t use spotlight often, the first time you use it, it might take some time to find the applications you’re looking for. This will be much faster the next time you use it, and definitely faster than clicking your way through finder to your Applications folder.
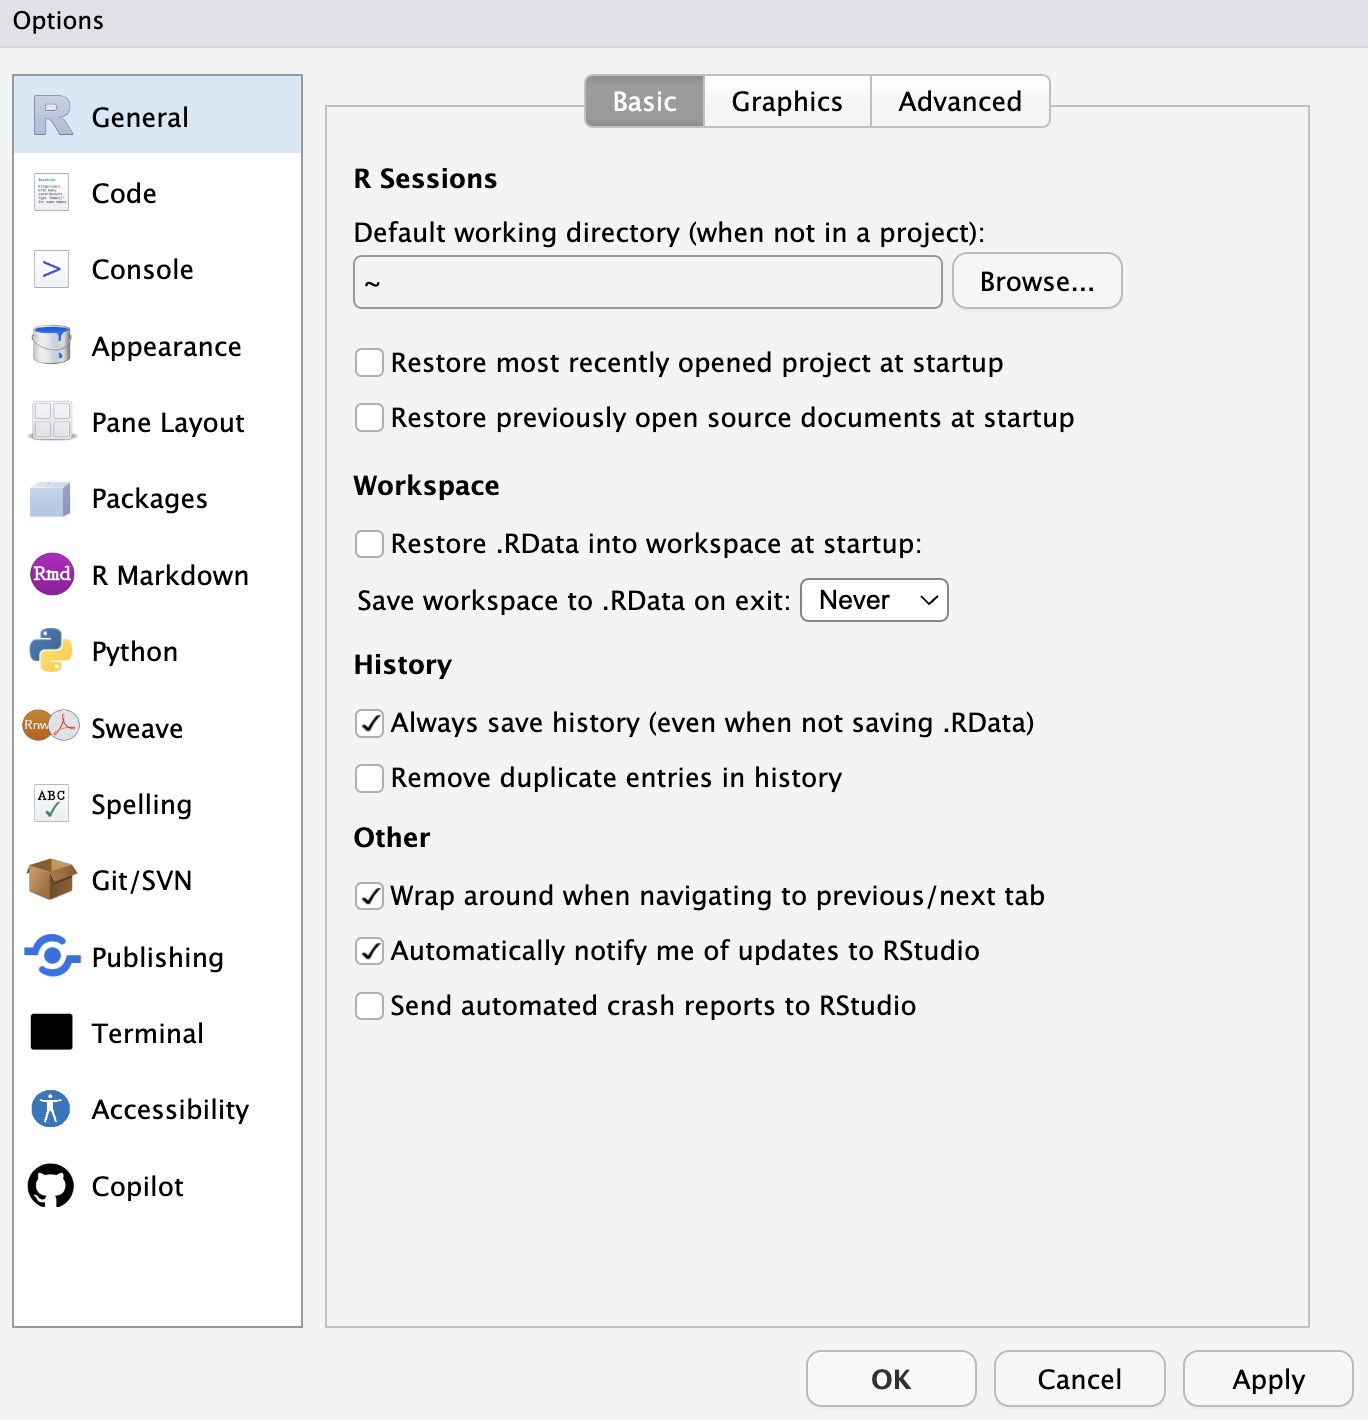
Once opened, click the Tools menu, and then click Global Options.
In the General section, uncheck Restore most recently opened project at startup,
Restore previously open source documents at startup, Restore .RData inte workspace at startup:, and select Save workspace to .RData on exit: Never.
Then click apply.
Now we will install our first two packages, renv and usethis. renv will keep track of the dependencies in our future projects, and usethis will assist us in our workflow when creating new projects (or R-packages). In the console type:
Install renv
install.packages("renv")Install usethis
install.packages("usethis")This marks the end of this Setup guide. In the following section, we will go through a suggested workflow when starting a new project.